|
Then in the Top View of the editor hold down your LMB and drag across the desired faces, area, you wish to start creating the terrain shape from. As you are dragging you will see a red rectangular box that will indicate the area you are selecting. Once the area is surrounded, let go of your mouse button and all of those up faces will turn red, indicating what has been selected for movement or pulling.
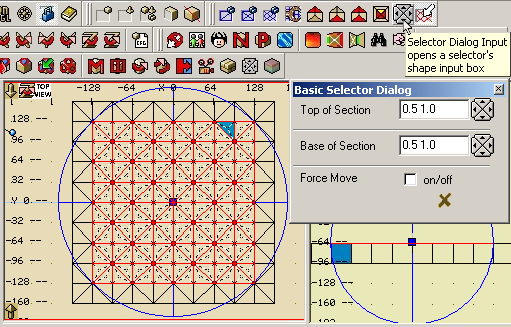
Once a selection has been made like this, you can then activate the Selector Dialog Input button just to the left of the Basic Selector button. This will bring up this particular selector's dialog input box. This Basic Selector Dialog box is only used by the
Basic Selector button. As future selectors are added, they too can have their own dialog box that will relate to their particular features. This and other details about the Selector Dialog Input function and the Basic Selector are covered on the 'Menus and Toolbar-icons' page.
|
|
|
The Basic Selector Dialog box is used to change the way the terrain will be created as a pull is taking place by entering two sets of values per input window. The first value being a percentage factor, which is applied to the second factor, and the second amount in units that will be added or subtracted from the actual movement. The dialog box can be dragged to any location by placing your mouse cursor over its blue title bar, holding down the LMB and moving it. It can also be resized like any other window and it will remain open and on top of the editor for your use until you click on the X button to close it. The first time you use the dialog box it will have default values already set in it that are also the default settings for that particular Terrain Selector. Once these settings are changed they are stored and saved to keep them the same until you change them again in another session of QuArK.
With that covered, you are now ready to drag and shape your terrain. The dialog box can remain open or closed during this process. It is best to use the editors Side or Front View to do the actual dragging of the terrain. Although both, the dragging and selection process, can be done in any of the 2D or 3D views. However, you will notice, if you do your dragging in the 3D views, that it will be much slower and jerky in appearance.

|
Place your mouse cursor over the center blue movement handle and holding down the LMB slowly move your cursor towards the top of the editor view. You should now see your terrain taking shape as you move your mouse further. If the size and amount of terrain you are moving is not too large, you will also see the changes in all of the other views, including the 3D views, as well. If not, briefly pausing, without releasing the LMB, will allow the editor to catch up for the redrawing of all of the views. This is the process that QuArK has to go through and why, sometimes, you may not see movement in the other views while you are dragging.
One other item about dragging. If the 3D view should become distorted during a drag, you can usually clear this up by pressing your Tab key a couple of times. This is the Default Hot Key to cause all of the views to be redrawn. This can also be done while you are dragging if need be.
Control of your mouse movement is the key here! Because of the way that QuArK processes terrain movement, the mouse curser will not remain on the center handle, but will tend to drift above or below it, depending on which direction you are dragging. This is normal. There is also a delay in movement reaction by the editor, for the same reasons, which can sometimes cause a run away effect to the terrain you are dragging. If this should happen, simply stop moving your mouse and release the LMB without canceling your terrain selection. Then click on the center handle again and slowly start your movement in the opposite direction. This will stop the run away movement all together and reset the handle co-ordinances to react properly once again.
If you are unable to use the stop and restart method because things have just gone too far already, then use the Edit menu Undo / Redo... function which will usually take you back to a safe point from which you can start from again. For these reasons I highly recommend that you save your work and/or make a backup copy as you reach critical stages in your map editing process.
|
These three buttons of the toolbar are the Face Conversion buttons. This is a very unique feature of the QuArK Terrain Generator that allows you to shape your terrain from the top (up faces), bottom (down faces) or both at the same time by simultaneous movement moving in the same direction at the same time.
|

|
|
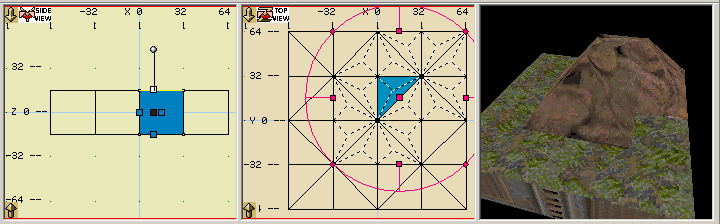
Once again the buttons are designed for easy recognition as to exactly what each one of them does. This is demonstrated in the side view screen shots below where the selected faces are highlighted in red with the movement handle centered on the group selected.
|
|
And their corresponding 3D Textured views dramatize this even further. The first denotes standard surface treatment for a hill or mountain, the second could be textured to represent stalactites hanging inside of a cave and the third puts both of those elements together to create that mountain and cave. By isolating your down face selections in various locations and pulling them downward, you would then create those stalactites throughout your cave.
|
|
By using both sides of your terrain sections in this manner, you can create some dazzling effects while keeping your poly count to an absolute minimum, which is a very important element of any game mapping. And, by using different sections of terrain of different grid sizes, smaller ones for nice detail work and larger ones for general coverage, this will assist you even further to maximize your surrounding effects while still remain efficient in your map creations.
|
|
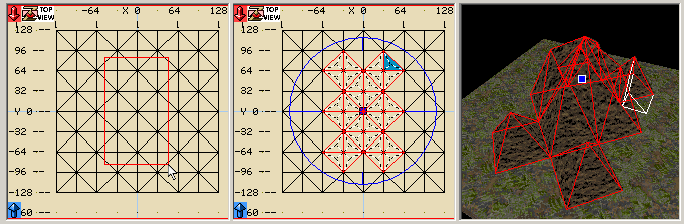
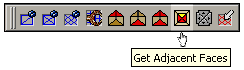
Another very nice tool is the Adjacent Faces Selector button. The function that it provides is that of selecting one particular face, either up , down or both, and then ,by clicking this button, having all of the adjoining faces that it touches added to your selection automatically.
|
|
|
This can create some very nice random and staggered effects to your terrain as illustrated below. Here, using just a slight amount of drag, we have created a rugged effect. Then by merely adding some grass and twig texturing to the flat area and fair size boulder texture to the random area, we have just given our surroundings a nice look with very little effort. Thank you Rowdy!
|
|
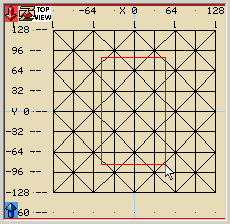
The selection process it self is also different for a very specific reason. Where the QuArK Standard Selectors will select any poly that it touches, the Basic Selector will not. Instead, it only selects a face if the center point of that face is within the selector's red rectangular selection box. It was designed this way so that odd and ill regular selections could be made.
|
|
Another nice feature of the Basic Selector is its ability to select only surface faces to aid in the process of texturing the terrain. More on the subject of using the Basic Selector for texturing techniques is covered on the 'Texture' page.
|
|